Active Cycle

a bicycle with a wooden frameCategoriesQuestions Ask Buy Bicycle

Questions to Ask Before You Buy Bicycle Maintenance and Upgrade Products

If you are comparing bicycle maintenance and upgrade products, the hardest part is not finding options. It is figuring out which ones actually fit your bike, your riding habits, and your budget. For riders shopping online or in a store, that question matters because product pages often highlight features without explaining compatibility, installation needs, or how the part may affect day-to-day use. Asking the right questions early can help you avoid returns, save time, and choose something that matches the way you ride. It also makes it easier to compare products without relying on hype or broad claims. A careful approach is especially useful when you are deciding between a small maintenance item and a larger upgrade that could change comfort, handling, or upkeep.

Key criteria that matter

  • Will the product fit your bike type and current setup?
  • Does it match the part it is meant to replace or improve?
  • Can you install it yourself, or will it need tools or a mechanic?
  • How often will you need to maintain or replace it?
  • Does the product solve a real problem you actually have?

These questions help you separate useful upgrades from items that only look appealing on a product page. A maintenance product should make routine care simpler, more consistent, or more reliable. An upgrade should address a specific need, such as comfort, control, durability, or ease of use. If you cannot explain why you need the item in one or two sentences, it may be worth slowing down before you buy.

How do you know whether a product fits your bike?

Compatibility is the first filter. Start by checking the part category, the size, and any standards listed by the seller or manufacturer. For example, a component may look similar to the one already on your bike but still differ in mounting style, dimensions, or interface. That is why it helps to compare the item against the exact part you are replacing, not just the product name.

It also helps to think about the full setup, not only one piece at a time. A chain, brake part, tire, pedal, or accessory may interact with other components. If a product depends on a certain frame type, wheel size, drivetrain, or tool standard, note that before you order. When details are unclear, a quick comparison of specifications is usually more useful than relying on product photos alone.

Why do maintenance and upgrade choices affect daily riding?

The stakes are practical. A maintenance item can influence how often you clean, adjust, or replace other parts. A poorly matched upgrade can create extra work, such as harder installation, more frequent adjustment, or a mismatch with your current setup. Even a small change can affect comfort or efficiency in ways you notice on every ride.

That is why it helps to think beyond the purchase itself. Ask whether the item will reduce friction in your routine or add another task to manage. If the answer is unclear, compare a few alternatives and focus on how each one fits your use case rather than on broad product claims.

What mistakes do buyers make when choosing bike products?

  • Buying by appearance instead of by fit and function
  • Skipping compatibility checks for size, mount, or standard
  • Ignoring whether installation needs special tools
  • Choosing an upgrade without a clear riding problem to solve
  • Overlooking how much ongoing care the product may require
  • Assuming a higher price automatically means better value for their situation

These mistakes are common because many listings focus on features rather than on use. A better approach is to slow down and compare the details that matter after the purchase, not just the details that sound impressive before it.

What is a practical way to compare options before you buy?

  1. Write down the problem you want to solve.
  2. Check whether the product is made for your bike type or part standard.
  3. Look for installation requirements and tool needs.
  4. Compare how much upkeep the product may need later.
  5. Read the specifications before reading the feature summary again.
  6. Choose the option that fits your actual use, not the longest feature list.

This process works well because it turns a broad shopping decision into a few direct checks. It is easier to compare two products when you already know your priority, whether that is easier maintenance, better comfort, or a straightforward replacement for a worn part.

One pattern I see often is that buyers feel unsure when a product promises many benefits at once. In practice, the clearest choices are usually the ones with the fewest surprises. If a product is easy to identify, easy to fit, and easy to maintain, it is simpler to evaluate on real value rather than on marketing language.

When should you ask for help before buying?

Ask for help when the product affects a critical part of the bike, when compatibility is not obvious, or when installation seems more involved than a simple swap. That is also useful if you are comparing two close options and cannot tell which one matches your current setup. If you are unsure, a mechanic, a knowledgeable shop staff member, or a detailed product specification sheet can help you confirm the right direction. Rules and product standards can vary by item type and market, so it is wise to verify details before ordering.

Can you use a checklist to narrow the choice?

Yes. A short checklist can keep the decision practical.

  • Does it fit my bike and existing parts?
  • Does it solve a specific problem I already have?
  • Can I install and maintain it with the tools and skills I have?
  • Will it reduce effort, or will it add more upkeep?
  • Does the specification sheet answer my main questions clearly?

If the answer is yes to most of these points, you are probably looking at a better match than a product chosen only for its description or appearance.

How do I compare a maintenance item with an upgrade item?

Compare them by purpose, not by category name. A maintenance item supports the condition of the bike. An upgrade changes how the bike feels or functions. If you want lower effort over time, a maintenance-focused choice may be the better fit. If you want a specific improvement in comfort, control, or convenience, an upgrade may make more sense.

What if the product description is vague?

If the description is vague, look for the specification details first. Check dimensions, materials, compatibility notes, and installation requirements. If those details are missing, it may be hard to judge whether the item is a good fit without extra confirmation.

Should price decide the choice by itself?

Not by itself. Price can be one factor, but it does not tell you whether a product fits your bike, matches your needs, or is easy to maintain. A lower-cost item that fits well may be more useful than a more expensive one that creates extra problems.

What is the safest way to make the final decision?

The safest approach is to confirm fit, confirm purpose, and confirm installation needs before you buy. When those three points are clear, the choice is usually much easier to defend.

What should you do next if you are still deciding?

Start with your bike’s current setup, then compare only the products that fit that setup and solve the same problem. That keeps the decision focused and reduces guesswork. If you want a simpler next step, review the product details carefully and use the checklist above before you add anything to your cart.

For a more confident purchase, take one product at a time and ask: does it fit, does it help, and can I live with the upkeep? If the answer is clear, you are much closer to a choice that makes sense for your bike and your riding routine.
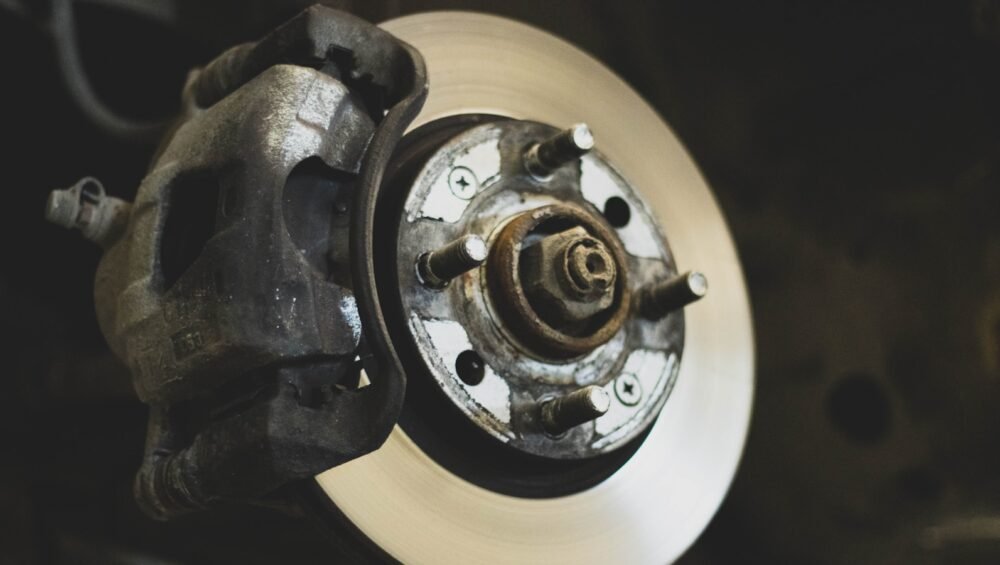
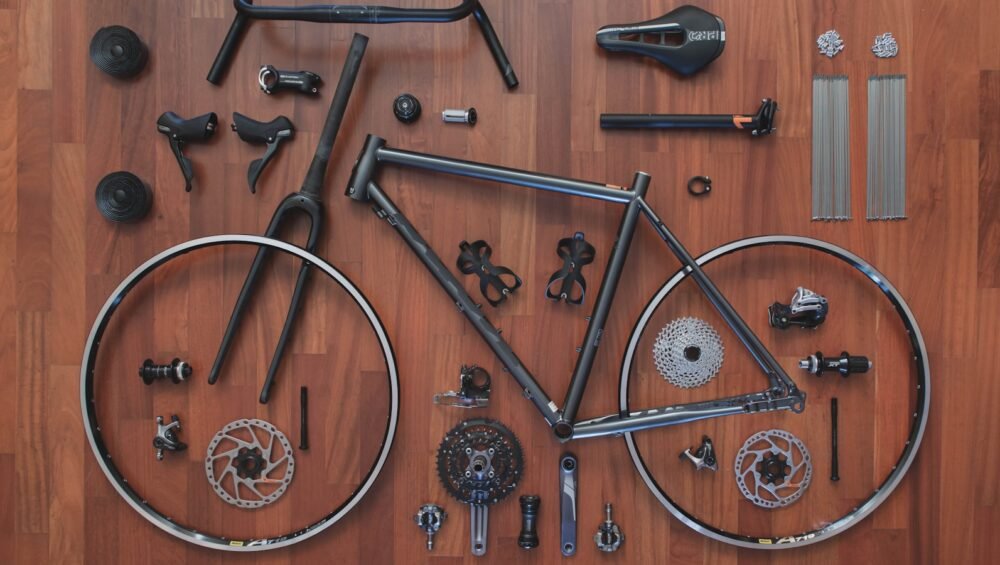
white and silver round deviceCategoriesBrake System Guides Common

Brake System Guides: Common Mistakes Riders Can Avoid

Brake system guides can save riders time, money, and frustration, but only when they are followed with care. If you are a cyclist, a home mechanic, or someone trying to understand bicycle parts better, the real challenge is not finding instructions. It is spotting the steps people skip, misunderstand, or apply too broadly. A small mistake in setup or maintenance can lead to noisy brakes, uneven stopping, poor feel at the lever, or unnecessary wear. This article breaks down the most common brake guide mistakes and shows how to avoid them with a simple, practical approach. If you want a broader bicycle care reference while you read, the blog can help you connect brake advice with other maintenance topics.

Here is the short version of what matters most:

  • Follow the guide that matches your brake type and parts.
  • Check pad wear, cable condition, and alignment before making changes.
  • Keep each adjustment small so you can see what changed.
  • Test the brake after every step, not only at the end.
  • Use clean parts and the right tools for the job.
  • Get help if you are unsure about safety-critical adjustments.

Why do brake system guides go wrong so often?

Brake guides usually go wrong because they assume every bike behaves the same way. In practice, brake type, lever feel, pad shape, cable stretch, rotor condition, and rim wear can all change the result. A guide that is too general can still be useful, but only if you compare it with the parts on the bike in front of you. The most common issue is copying a step without checking whether it fits the actual setup. Another frequent problem is doing several adjustments at once, which makes it hard to know what fixed the issue or made it worse. Careful matching and one-change-at-a-time thinking solve many of these problems.

What mistakes should you look for first?

Some mistakes appear again and again when riders follow brake instructions too quickly.

  • Using a guide for the wrong brake type, such as mixing rim brake and disc brake steps.
  • Ignoring pad wear, cable fraying, or contamination before adjusting anything.
  • Over-tightening parts and reducing free movement.
  • Setting pad position without checking toe-in or contact angle when relevant.
  • Skipping the test ride or stationary test after the adjustment.
  • Assuming squeal means the same cause in every case.

These issues matter because brake performance depends on small details. A slightly misaligned pad, a dirty braking surface, or a cable that is routed poorly can change how the brake feels and how predictably it responds. Good guides explain the order of checks, but they cannot replace a close look at the bike itself.

How can you use a brake guide more safely?

The safest way to use any brake guide is to slow the process down and check one variable at a time. Start with inspection, then move to adjustment, then finish with testing. If the guide mentions torque, alignment, or pad clearance, treat those as checkpoints rather than suggestions. It also helps to compare both sides of the brake system, since uneven wear or uneven positioning often causes the symptom you are trying to fix.

When a guide uses general language, translate it into your bike’s actual parts. For example, if the instructions say to inspect the cable housing, confirm that your setup uses cables in the first place. If the guide discusses rotors, make sure you are working with a disc brake system. That simple habit avoids most of the confusion riders run into.

What happens if you skip the details?

Brake mistakes can turn a simple maintenance task into a repeated problem. You may hear noise, feel vibration, or notice inconsistent lever response even after several rounds of adjustment. In some cases, repeated over-adjustment can create new wear instead of solving the original issue. The real cost is not only parts or time. It is confidence. When a brake system feels unpredictable, riders stop trusting the bike, and that affects everyday use.

For that reason, brake guidance should be treated as a process, not a shortcut. If the first fix does not hold, the right move is to return to inspection rather than forcing the same adjustment again.

What mistakes do riders make during maintenance?

  • Cleaning only the visible surface and missing contamination on pads or rotors.
  • Reusing worn parts because they still look serviceable at a glance.
  • Making large adjustments instead of small, trackable changes.
  • Forgetting to center the brake after changing cable tension or pad position.
  • Testing only once and assuming the result will stay stable.

A practical habit is to document what you changed. Even a simple note about pad position, lever feel, or cable tension can help you avoid repeating the same guesswork later. That is especially useful when a problem returns after a ride or after weather changes.

What does a careful step-by-step approach look like?

  1. Identify the brake type and the parts involved.
  2. Inspect pads, cables, housing, rotors, and mounting points for wear or damage.
  3. Clean the braking surfaces with the right method for the parts you have.
  4. Make one adjustment at a time.
  5. Check lever feel and wheel clearance after each change.
  6. Test the brake in a safe, low-risk area.
  7. Recheck everything after the first ride.

This order works because it reduces guesswork. You see the condition of the system before changing it, and you can tell which step improved the result. That makes future maintenance easier too.

What do experienced mechanics watch for that beginners miss?

A common pattern is that experienced mechanics do not start with the adjustment. They start with the symptom, then they inspect the wear pattern. If the pad is uneven, if one side sits differently, or if the lever pull changes too quickly, they use that pattern to narrow the cause. The lesson for riders is simple: symptoms are clues, not instructions. If you treat every issue as a single adjustment problem, you may miss the underlying cause. Looking at wear patterns first often prevents repeat work and helps you choose the right fix sooner.

When should you get help instead of continuing on your own?

Get help when the brake still feels unsafe after a careful inspection and basic adjustment, or when you are unsure whether a part is worn beyond what you can judge confidently. It is also wise to stop if a guide conflicts with what you see on the bike, or if a repair would require tools or experience you do not have. Rules and service expectations can vary by product and region, so if a step involves regulated safety requirements or manufacturer-specific procedures, confirm locally or with a qualified service source.

Can a brake guide fix every stopping problem?

No, not every issue comes from adjustment

Some problems come from worn parts, contamination, damaged hardware, or a mismatch between the guide and the brake type. A guide is a starting point, not a guarantee.

Should I clean before I adjust?

Yes, cleaning and inspection should usually come first. Dirt or contamination can hide the real cause of poor braking and make an adjustment seem ineffective.

Is it okay to make several changes at once?

It is better not to. One change at a time makes it easier to see what helped and prevents new problems from being added during the process.

How do I know when to stop troubleshooting?

If the brake still feels uncertain after basic inspection, careful adjustment, and testing, stop and get a qualified opinion. Safety-critical parts deserve a careful hand.

Brake guides are most useful when they help you slow down, inspect first, and adjust with purpose. The biggest mistakes are usually simple: wrong guide, skipped inspection, too many changes at once, and no real testing after the work is done. If you keep the process methodical, you will solve more problems with less trial and error. For a practical next step, review your brake setup against a trusted guide and work through the checklist one item at a time.

a bicycle with a wooden frameCategoriesCompare Bicycle Buying Guides

How to Compare Bicycle Buying Guides with More Confidence

Choosing a bike can feel simple until the details start to pile up, especially when you are comparing models, specs, and fit notes across multiple listings. For shoppers reading understanding bicycle buying guides: key details and next steps, the challenge is not finding information, but knowing which details actually matter for the rider and the use case. That matters because a bike that looks appealing on paper may feel awkward, harder to maintain, or less practical once you bring it home. If you are comparing bikes for commuting, casual riding, or weekend use, a clear reading process helps you slow down, compare the right features, and avoid choices based only on appearance or a short spec list.

What should you focus on first when reading a bicycle buying guide?

Start with the few details that shape comfort and usability most directly. A useful guide usually helps you narrow options before you get lost in technical terms.

  • Rider fit, including frame size and reach
  • Intended use, such as commuting, leisure, or mixed riding
  • Frame style and riding position
  • Wheel size and tire width
  • Gearing range and brake type
  • Maintenance needs and overall simplicity

Once those basics are clear, the rest of the guide becomes easier to interpret. You can read the detailed features as support for the main decision, not as the decision itself.

How do you compare bike features without getting overwhelmed?

The easiest way is to compare one category at a time. Instead of scanning the whole guide repeatedly, build a short checklist and use the same questions for each model.

For example, ask whether the bike is designed for upright comfort or a more forward riding position. Then check whether the gearing seems simple enough for your routes. After that, look at brakes, tire width, and frame material only in relation to the riding conditions you expect.

This approach keeps the comparison practical. It also makes it easier to spot which details are cosmetic and which ones change how the bike will actually feel.

Why does fit matter more than a long spec list?

Fit often influences satisfaction more than a single upgraded component. A bike with attractive parts can still feel wrong if the frame size, riding position, or handlebar setup does not match the rider.

In many buying guides, fit is described in broad terms rather than as a final answer. That is normal. The guide can point you in the right direction, but it cannot replace a real assessment of body proportions, comfort preferences, and riding habits.

If you are comparing options online, treat fit as a filter. A bike that does not match the rider well should usually move down the list before you spend time comparing accessories or small equipment differences.

What are the most common mistakes to avoid?

Many buyers focus on the wrong detail first. That can make the process longer and more confusing than it needs to be.

  • Choosing by appearance before checking fit
  • Assuming more gears automatically means a better match
  • Ignoring tire width and riding position
  • Reading feature lists without considering terrain or route type
  • Overlooking maintenance needs for brakes, drivetrain, and tires
  • Comparing bikes from different categories as if they serve the same purpose

A guide is most helpful when it helps you narrow the field. If it leaves you with more questions than answers, step back and return to the basics: fit, use case, and comfort.

What action steps make a buying guide more useful?

Use a short process so the guide becomes a decision tool instead of just background reading.

  1. Write down the rider’s main use case.
  2. Set a comfortable riding position as a priority.
  3. Compare frame size and geometry notes first.
  4. Check gears and brakes only after fit makes sense.
  5. Review tire size, weight, and maintenance needs.
  6. Shortlist only the bikes that meet the basic comfort and use criteria.

If you are comparing several products, keep a simple note for each one. A short summary often reveals the strongest option faster than rereading long descriptions.

What pattern do experienced shoppers use when comparing bikes?

One common pattern is to compare from the rider outward, not from the parts list inward. Experienced buyers usually start with the rider’s posture, the route, and the type of riding they expect. Only then do they look at components.

That pattern works because it reduces distraction. Two bikes may have similar features on paper but deliver a very different ride if one is more upright, simpler to maintain, or closer to the rider’s height and reach needs.

In practice, this means the guide should help you answer one question at a time: does this bike fit the person and the purpose before anything else?

When should you ask for more help before choosing?

It helps to get more guidance when the guide leaves you unsure about size, riding position, or intended use. That is common when a buyer is between categories or comparing options for more than one rider.

It also makes sense to ask for help if you are unsure how to interpret geometry, brake type, or gearing notes. Those details can be useful, but they are easier to evaluate with a clearer sense of the rider’s priorities.

If a decision still feels unclear after you narrow the basics, pause rather than guessing. A little more review can prevent a choice that looks fine online but feels off in use.

What questions do shoppers usually ask about bicycle buying guides?

How do I know which details matter most?

Focus on fit, riding position, intended use, and comfort first. Those details usually shape the day-to-day experience more than isolated feature upgrades.

Should I compare every specification listed?

No. Compare the details that affect fit, use, and maintenance first. Extra specifications matter more after the bike already matches the rider’s needs.

Can a buying guide replace trying a bike in person?

Not fully. A guide can help you narrow options and ask better questions, but it cannot replace a real comfort check when that is available.

What if two bikes seem very similar?

Use the rider’s priorities to break the tie. Small differences in frame size, posture, tire width, or maintenance needs can matter more than a long feature list.

Is it okay to choose a simpler bike?

Yes, if it matches the rider’s needs. Simpler can be a good fit when the riding pattern is straightforward and ease of use matters more than extra features.

What is the best next step after reading a buying guide?

Take the details from the guide and turn them into a short comparison list. Keep your attention on fit, use case, comfort, and maintenance before you decide between models. If the options still feel close, return to the rider’s main priorities and remove anything that does not support them. That simple process makes understanding bicycle buying guides: key details and next steps much more manageable. The next step is to compare a few bikes against the same checklist and choose the one that fits the rider’s needs most clearly.

selective focus photo of bicycle partCategoriesCommon Bicycle Parts Explained

Common bicycle parts explained: mistakes to avoid when choosing replacements

Choosing a replacement part for a bike can feel straightforward until the new piece does not fit, does not match the rest of the setup, or simply does not solve the problem you were trying to fix. For riders, parents shopping for a growing child, and online buyers comparing product listings, the challenge is not just knowing the names of common bicycle parts explained in a catalog. It is knowing which details matter before you place an order. Small mismatches can lead to extra time, avoidable returns, and more frustration than the original repair. A careful approach helps you narrow the choice, check compatibility, and avoid buying something that looks right but works poorly once installed.

If you want a broader store reference while you compare terms, you can start with the bike parts guide archive for related articles and terminology.

What should you check before replacing a bicycle part?

  • Measure the part you are replacing, not just its name.
  • Match the connection point, size, and shape as closely as possible.
  • Check whether the part must work with a specific frame, wheel, or drivetrain setup.
  • Look for wear on nearby parts that may affect the new piece.
  • Read product details slowly so you do not rely on a single photo.

Why do bicycle part replacements go wrong so often?

Replacement mistakes usually start with assumptions. A part may look similar across listings, but bicycle components often depend on exact dimensions, mounting style, and system compatibility. A buyer may search by a familiar part name and miss a detail such as diameter, thread type, bolt pattern, or intended use. That is why a part name alone is rarely enough.

Another common issue is replacing one worn item while ignoring the parts around it. For example, a noisy component might seem like a single-part problem, but wear in a related area can affect how the new piece performs. The safe habit is to inspect the surrounding area before you buy. That reduces the chance of solving only part of the problem.

Which buying mistakes create the most avoidable returns?

When people compare common bicycle parts explained in product listings, a few mistakes show up again and again. These are the ones most worth avoiding:

  • Buying by appearance instead of size or specification.
  • Ignoring whether the part is meant for a particular type of bike.
  • Assuming all parts with the same name are interchangeable.
  • Skipping the measurement of the old part before ordering.
  • Overlooking tool requirements, mounting hardware, or included accessories.
  • Replacing one piece without checking whether nearby wear will affect it.

A practical example is a buyer who orders a replacement based on a product title only. The part may seem correct, but if the mounting style is different or the dimensions are off, the item may not install cleanly. The result is usually more delay than savings.

How do you compare parts without getting lost in technical details?

Use a simple process and keep it consistent. Start with the part you are replacing, then work outward to the larger system it belongs to. A quick check can save a lot of second guessing.

  1. Identify the part name and its function.
  2. Measure the old part where size matters.
  3. Compare the mounting style, connection point, and shape.
  4. Check whether the new part is intended for your bike type or setup.
  5. Review the product description for included hardware or special notes.
  6. Confirm that any related parts are still in usable condition.

This process works because it moves from the physical part to the product listing instead of the other way around. That order makes it easier to spot mismatches before they become a problem.

What are the risks of choosing the wrong part?

The immediate risk is a poor fit. The part may not install at all, or it may install in a way that feels unstable or unfinished. In other cases, the issue shows up later. A mismatched part can wear unevenly, create noise, or place extra stress on nearby components. Even when the part seems usable at first, it may not hold up well in normal riding.

There is also a practical cost. A wrong purchase can mean more time spent on returns, more time waiting for a replacement, and more chance of ordering the wrong item again. For anyone handling repairs on a schedule, that delay matters.

What mistakes should you avoid while inspecting the bike?

  • Do not assume a part is fine because it still moves.
  • Do not ignore cracks, bending, or uneven wear.
  • Do not replace one item without checking the parts it touches.
  • Do not rely on memory for measurements.
  • Do not skip the product notes about fit or use case.

What habits make replacement shopping easier?

Good replacement shopping is mostly about record keeping and patience. Keep a note of the part name, any measurements you took, and any details from the old item that help identify it later. If you are shopping for a child’s bike or managing multiple bikes, label those notes clearly so you do not confuse one setup with another.

It also helps to compare one item at a time. When shoppers open too many tabs and compare too many variations at once, it becomes easy to overlook the one detail that matters. A slower review usually leads to a better match.

What pattern do experienced buyers follow?

One pattern shows up often: experienced buyers do not start with the catalog image. They start with the bike itself. They inspect the old part, confirm the dimensions, and only then compare listings. That habit reduces guesswork. It also makes it easier to notice when two parts share a similar name but serve slightly different setups. In practice, this approach is less about knowing every technical term and more about following the same checks every time.

When should you get help with a replacement?

If the part is part of a critical system, if the old item is hard to identify, or if the bike uses a less familiar setup, it may help to ask someone who can review the measurements and fit details with you. Rules and product standards can vary by maker and by market, so confirm compatibility carefully before buying. If you are unsure after checking the basics, it is better to pause than to guess.

Can you use part names alone when buying online?

Do product titles tell the full story?

No. A product title usually gives a starting point, but it does not always include the details that decide fit. You still need to confirm size, mounting style, and any compatibility notes.

What should you do if the listing is unclear?

Look for the measurement details, check the item description again, and compare it with the part you removed. If the listing still leaves too much uncertainty, avoid guessing.

Is it enough to match the old part by shape?

Not always. Shape can be a helpful clue, but fit depends on more than appearance. Dimensions and connection points matter just as much.

Why do small details matter so much?

Because even a small mismatch can affect installation and performance. A part that seems close can still behave differently once it is installed.

What should you remember before you order a replacement?

The safest approach is to treat every replacement as a fit check, not just a name match. Measure first, compare carefully, and inspect the surrounding parts before you buy. That habit helps you avoid the most common mistakes and makes the search much easier to manage. If you are comparing options now, use the steps above as a quick checklist before you place the order.

For the next step, review the bike, note the exact part details, and compare them against a trusted product listing before you decide.

white road bike leaning on teal wooden wall during daytimeCategoriesQuestions Ask Choosing Bicycle

Questions to Ask Before Choosing Bicycle Maintenance Items

Choosing bicycle maintenance items can feel straightforward until you start comparing cleaners, lubricants, pumps, brushes, patch kits, and basic tools. If you are shopping for your own bike, or helping a family member keep one in good shape, the hard part is not finding products. It is figuring out which items match the bike, the kind of riding you do, and how much routine care you are realistically willing to handle. That matters because a simple home setup can make maintenance easier to keep up with, while the wrong mix can leave you with unused products and avoidable frustration. If you want a practical way to compare bicycle maintenance items, start by asking the right questions before you decide.

Key criteria that matter

  • Does this item fit the type of bike you own?
  • Is it meant for cleaning, lubrication, inflation, repair, or inspection?
  • Will you use it often enough to justify keeping it at home?
  • Does it require any special parts, refills, or attachments?
  • Can you store it safely and use it without a steep learning curve?

How do you match a maintenance item to your bike?

The first question is whether the item is actually compatible with your bike and its components. A maintenance product that works well for one setup may be awkward or unnecessary for another. For example, a pump needs the right valve connection. A cleaner should be safe for the parts it will touch. A lubricant should suit the conditions you ride in and the parts you plan to maintain. The same idea applies to tools and repair kits. If you do not know whether a product matches your bike, check the bike type, the component type, and the manufacturer guidance before you buy.

Compatibility is also about the level of care you want to handle yourself. Some riders only need a few basics for quick upkeep. Others want more complete tools for regular home maintenance. A product can be useful without being necessary, so the question is not just whether it works. The real question is whether it fits your routine.

Why does routine matter when choosing bike care products?

Maintenance items are easier to use when they fit your habits. If you plan to clean and inspect your bike often, simple tools and easy-to-store supplies may be enough. If you only want to handle occasional issues, a small kit with the basics may make more sense than collecting specialized items you rarely touch. This is where many buyers save time later: they think first about the kind of upkeep they will actually do, not the broad list of everything they could buy.

In practice, the most useful item is often the one you are willing to use consistently. A product that feels complicated or hard to store may stay in a drawer, while a modest setup can support regular care. That is why the decision should start with your maintenance habits, not with the longest product list.

What problems do people run into when choosing these items?

Common mistakes usually come from buying too much, buying the wrong type, or skipping the basic questions that reveal fit. Use this checklist to slow down the decision:

  • Buying a cleaner, lubricant, or tool without checking whether it suits your bike parts
  • Choosing a kit with pieces you are unlikely to use
  • Ignoring storage space, especially for larger pumps or multi-piece tool sets
  • Assuming a product is simple to use without reading the instructions
  • Forgetting about refill needs, replacement parts, or consumable items

Another common issue is treating all maintenance items as equal. They are not. Some are for routine care, some are for prevention, and some are for repairs when something goes wrong. Knowing the difference helps you avoid duplicate purchases.

A practical evaluation process

A simple comparison process works better than trying to evaluate everything at once. Start with the job you need the item to do, then check whether it matches your bike and your routine. After that, look at how easy it is to use, store, and keep supplied over time. A product that fits all four points is usually easier to live with than one that only looks complete on the page.

Here is a practical order to follow:

  1. List the maintenance tasks you actually want to handle.
  2. Separate must-have items from optional extras.
  3. Check compatibility with your bike and parts.
  4. Review whether the item needs ongoing refills or accessories.
  5. Choose the simplest option that covers your real use case.

What is a useful experience-based pattern to remember?

One pattern shows up again and again: buyers who start with a narrow maintenance goal usually feel more satisfied than buyers who try to prepare for every possible repair at once. A compact set for cleaning, inflation, and small fixes is often easier to use than a larger collection of specialized items. That does not mean bigger kits are wrong. It means the most workable setup is usually the one that matches how often you maintain the bike and how much confidence you have doing it.

This pattern also helps when comparing bundles. If a bundle includes items you would not choose individually, it is worth asking whether those extras solve a real problem or just add bulk.

When should you ask for help before deciding?

It makes sense to ask for help when you are unsure about compatibility, when a product involves a more technical repair, or when you are not confident reading product descriptions. You should also get help if you are comparing a few similar options and cannot tell which one fits your maintenance routine. In those cases, a short conversation can save time and reduce the chance of buying something you will not use.

For repairs that affect safety or performance, it is also wise to confirm whether the task is suitable for home maintenance or better handled by a qualified mechanic. Rules and service practices can vary, so local guidance matters.

What are the most common questions buyers still have?

Do I need a full toolkit to maintain a bike at home?

Not always. Many riders start with a few basics and add more only when a new task comes up. The right setup depends on your bike, your skill level, and the work you want to do yourself.

Should I buy products as a bundle or one by one?

That depends on whether the bundle matches your actual needs. A bundle can be convenient, but only if most of the included items are useful to you. If not, buying one by one may be the clearer choice.

How do I know if a maintenance item is beginner friendly?

Look for straightforward instructions, a clear purpose, and a setup that does not require special knowledge or extra parts. If the product description feels vague, it is reasonable to pause and ask for clarification.

What should I do if I am unsure about compatibility?

Check the bike and component details first, then compare them with the product information. If the fit still is not clear, ask a knowledgeable seller or mechanic before buying.

Can I keep a small maintenance kit and add more later?

Yes. That is often a practical way to start. Begin with the items you will use regularly, then expand only when your maintenance needs become clearer.

What is the simplest next step before you buy?

Make a short list of the maintenance tasks you want to handle, then compare each item against that list, your bike, and your comfort level with routine care. If a product does not solve a real need, you can skip it. If it does, focus on fit and usability rather than extras. That approach keeps the decision practical and helps you choose bicycle maintenance items with more confidence.

If you are still narrowing things down, review your options against your actual maintenance routine before adding anything to cart.

selective focus photo of bicycle partCategoriesBicycle Maintenance Fundamentals Checklist

Bicycle maintenance fundamentals checklist: what to review before you commit

Choosing a bicycle is easier when you know what upkeep will come with it. For shoppers comparing models, the real question is not only how the bike looks or rides today, but how much care it will need over time. A bicycle maintenance fundamentals checklist helps you review the parts that affect everyday reliability, from tire wear to brake feel and drivetrain condition. That matters for anyone buying online, because photos and product names rarely show how much work a bike may need after delivery. Before you commit, it helps to assess the bike as a complete system so you can match the model to your riding habits, skill level, and comfort with routine care.

Key criteria that matter

Start with the parts that affect safety, comfort, and future upkeep. A quick review can tell you whether a bike needs only basic attention or ongoing maintenance right away.

  • Tires and tubes, including tread wear, visible damage, and correct pressure range
  • Brakes, including lever feel, pad condition, and rotor or rim contact
  • Chain and drivetrain, including cleanliness, wear, and smooth shifting
  • Wheels, including true alignment and spoke tension
  • Frame and fork, including cracks, dents, and loose hardware
  • Fit points, including saddle height, handlebar position, and reach

If a seller or product page provides service notes, use them as part of your review. A bike that arrives assembled, tuned, or partially adjusted may still need a final check before regular use.

How do you judge whether the bike is ready for regular use?

Readiness comes down to how predictable the bike feels during basic checks. Spin the wheels, squeeze the brakes, shift through the gears, and look for rough movement or unusual noise. A ready bike should feel consistent, not stiff, sticky, or uneven. If you notice hesitation in the chain, pulsing in the brakes, or wobble in the wheels, those are signs that the bike may need adjustment before committed use. For online buyers, this step is especially useful because it separates cosmetic appeal from real mechanical condition. When possible, compare what you see in the listing with what you can verify after delivery or inspection.

Why does maintenance condition matter before you buy?

Maintenance condition affects both cost and convenience. A bike that needs immediate service can change the total value of the purchase, even if the sticker price looks good. It can also shape how quickly you can start riding, especially if replacement parts or tools are needed. For newer riders, a bike that requires frequent adjustment may feel frustrating and harder to trust. For experienced riders, the issue is usually time and predictability. A clear maintenance review helps you compare not only features, but also the work required to keep each option usable. That makes the buying decision more practical and less dependent on assumptions.

Which common mistakes do buyers make during a maintenance review?

Many buyers focus on appearance first and only think about upkeep after the order is placed. That often leads to avoidable surprises.

  • Skipping a close look at wear items such as tires, pads, and chain
  • Assuming a bike is ready because it is newly listed or freshly delivered
  • Overlooking fit issues that can create discomfort after a few rides
  • Ignoring signs of wheel wobble or brake rub
  • Forgetting to ask what tools, parts, or adjustments may be needed
  • Not separating routine care from repair work that may need a mechanic

A simple habit helps: treat each part of the bike as something that should either work now or have a clear, manageable plan for service.

What steps make a maintenance decision easier?

Use a repeatable process so you can compare bikes without guesswork.

  1. Check the listing or product details for assembly, tuning, and included parts.
  2. Review tires, brakes, chain, wheels, and frame condition in that order.
  3. Match the bike’s maintenance needs to your own tools and experience.
  4. Estimate whether the bike needs minor setup or a fuller service.
  5. Compare the expected upkeep with how often you plan to ride.
  6. Keep a short note of anything that needs follow-up after delivery.

If a specific model seems attractive but the upkeep is unclear, pause and gather more detail before buying. That small delay can prevent a larger mismatch later.

What pattern do experienced buyers follow when comparing bikes?

Experienced buyers usually separate “looks good” from “is easy to maintain.” They give extra weight to parts that wear out first and to the kind of service the bike is likely to need in the first month. That pattern saves time because it shifts attention away from surface features and toward the parts that affect daily use. In practice, this means checking whether the bike is simple to keep clean, simple to adjust, and simple to inspect. It also means asking whether replacement parts are easy to source and whether the setup matches the rider’s comfort level. This kind of review is not flashy, but it is reliable.

When should you get help with a bicycle maintenance check?

Get help if you see frame damage, brake problems you cannot explain, wheel wobble that does not improve, or shifting that remains rough after basic adjustment. You should also ask for support if you are unsure how to judge wear on a used bike or if the listing leaves out important service details. For regulated or safety-sensitive concerns, confirm any local requirements or service expectations with a qualified mechanic or the seller’s support team. If you are comparing bikes for a first purchase, a second opinion can make the decision much easier.

What answers do buyers usually want before they commit?

How much maintenance does a new bicycle usually need?

Most bikes need at least a basic setup check after purchase, plus ongoing care based on use, storage, and riding conditions. The exact level varies by model and assembly state.

What parts wear out first on a bicycle?

Tires, brake pads, chains, and other moving parts usually need the most attention over time. The pace of wear depends on riding frequency, surfaces, and weather exposure.

Can I judge maintenance needs from product photos alone?

No. Photos can help with appearance, but they rarely show brake feel, drivetrain wear, wheel true, or setup quality. Use product details and service notes too.

Should I avoid a bike if it needs some adjustment?

Not necessarily. Minor adjustment can be normal. The key is knowing whether the work is simple routine setup or something that needs repair or extra cost.

What should you do next before choosing a bike?

Review the bike as a working system, not just a product listing. Focus on the parts that wear first, the adjustments you can handle, and the service support you may need after purchase. If you are comparing options online, use this checklist to narrow the field before you place an order. A clearer maintenance review now can make ownership simpler later. For a practical next step, compare your shortlist against the maintenance points above and choose the bike that fits both your ride goals and your comfort with upkeep.

Select the fields to be shown. Others will be hidden. Drag and drop to rearrange the order.
  • Image
  • SKU
  • Rating
  • Price
  • Stock
  • Availability
  • Add to cart
  • Description
  • Content
  • Weight
  • Dimensions
  • Additional information
Click outside to hide the comparison bar
Compare
Shopping cart close